M3 SMART WM Key Customization
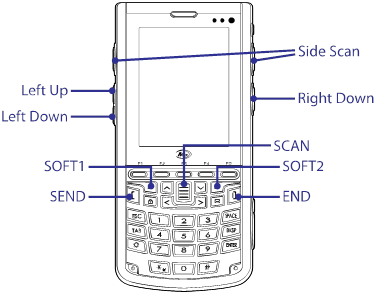
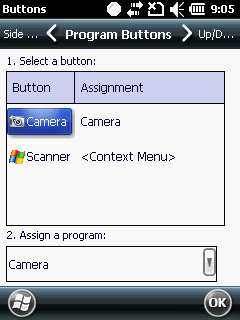
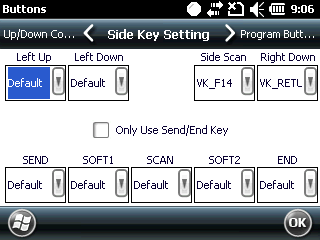
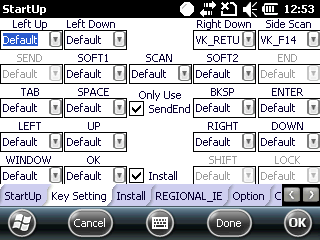
M3 SMART with Windows Mobile 6.5 provides 9 customizable keys as shown below.
1. GUI Method
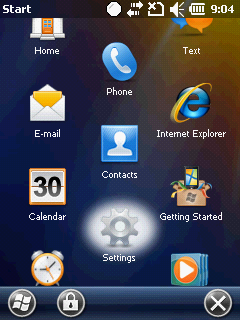
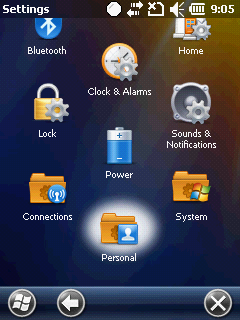
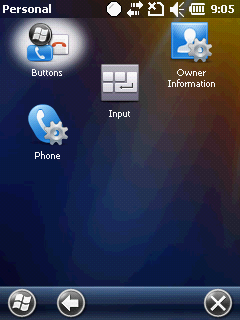
[Start] > [Settings] > [Personal] > [Buttons] > [Side Key Setting]
All keys shown above can be set to one of the following.
|
0
|
Default
|
Default value of the keys
|
|
1
|
VK_ESCAPE
|
Virtual key for escape
|
|
2
|
VK_F13
|
Virtual key for F13
|
|
3
|
VK_F14
|
Virtual key for F14
|
|
4
|
VK_F17
|
Virtual key for F17
|
|
5
|
VK_F18
|
Virtual key for F18
|
|
6
|
VK_SPACE
|
Virtual key for space
|
|
7
|
VK_RETURN
|
Virtual key for return
|
|
8
|
SIP ON/OFF
|
Toggles soft input panel
|
|
9
|
Application 1
|
User defined application1
|
|
10
|
Application 2
|
User defined application2
|
|
11
|
Windows
|
Windows key
|
|
12
|
Home
|
Home key
|
|
13
|
PgUp
|
Page Up key
|
|
14
|
End
|
End key
|
|
15
|
PgDn
|
Page Down key
|
|
16
|
VK_ACTION
|
Virtual key for Action
|
|
17
|
None
|
Disable the button
|
When ‘Only Use Send/End Key’ option is checked, SEND and END field is disabled and not customizable.
2. Mapping Applications
User can launch user defined application by pressing a button if it is set correctly. User can define 2 applications as shown in above table: Application 1 and Application 2.
The application must be in .exe file format and it can be set by setting a correct path in registry.
Path : HKEY_LOCAL_MACHINE\ControlPanel\Keypad\MultiFunc
Key : P1Path (for application 1)
: P2Path (for application 2)
Value: {.exe file location}
Example of assigning ScanEmul to Application 1 using StartUp.inf is shown below.
RegSetValue=/s string [HKEY_LOCAL_MACHINE\ControlPanel\Keypad\MultiFunc] P1Path : “\Flash Disk\Scanner\ScanEmul.exe”
3. M3.INI Method
By editing M3.INI file, you can customize the keys as well. M3.INI is located in the StartUp folder in the Flash Disk of the Device. To edit the file, you may require copying the file to your PC.
If you open M3.INI file, you will find the following section:
// M3SMART SideKey
// Function : 0=Default 1=VK_ESCAPE 2=VK_F13 3=VK_F14 4=VK_F17 5=VK_F18
// 6=VK_SPACE 7=VK_RETURN 8=SIP ON/OFF 9=excute application1
// 10=excute application2 11=Winodws Key 12=Home 13=PgUp 14=End 15=PgDn
// 16=VK_ACTION 17=None
// F1~F10key is the expansion key.
|
[M3SMART_SIDE_KEY]
Install=1
OnlySendEndFunc=1
VolumeUpKey=0
VolumeDownKey=0
RightDownKey=7
SideUpKey=3
SendKey=0
Soft1Key=0
ScanKey=0
Soft2Key=0
EndKey=0
TabKey=0
SpaceKey=0
BkspKey=0
EnterKey=0
LeftKey=0
UpKey=0
RightKey=0
DownKey=0
WindowKey=0
OKKey=0
ShiftKey=0
LockKey=0
|
//F1Key=0
//F2Key=0
//F3Key=0
//F4Key=0
//F5Key=0
//F6Key=0
//F7Key=0
//F8Key=0
//F9Key=0
//F10Key=0
|
From the file, change the value of Install to 1 and assign a value according to the function to each button as you like. Then, copy the modified M3.INI back to the StartUp folder. Customization will be applied after soft reset of the device.
To assign functions or applications to F keys, uncomment the entry in M3.ini.
i.e. remove // at the front of the entry.
4. VisualINI Method
To use VisualINI, first you need to install it. To install manually, you can click VisualINI.CAB in Driver folder of Flash Disk or to install automatically after reset, set install value of [VISUALINI_INSTALL] to 1 in m3.ini file.
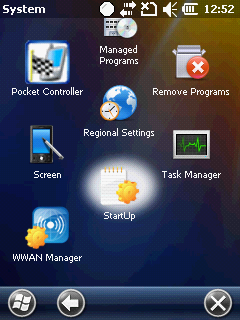
If VisualINI is installed, you can find StartUp icon at [Start] > [Settings] > [Systems] > [StartUp]
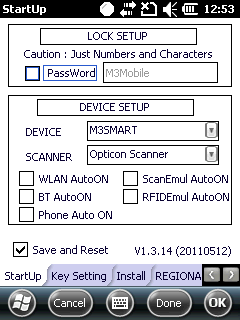
VisualINI provides the same function as the M3.INI file but with GUI. Hence, user can utilize VisualINI where directly editing M3.INI is not possible.
Make sure INSTALL checkbox is checked to make the modification affected.
5. Registry Change
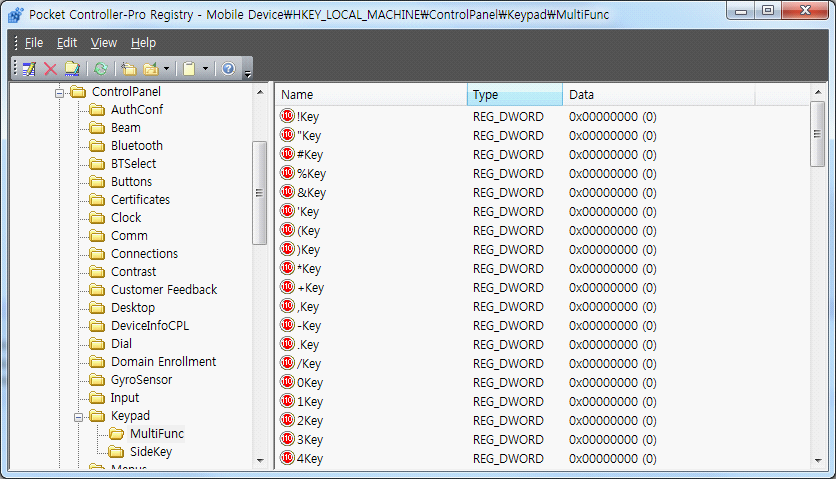
Under registry path: HKEY_LOCAL_MACHINE\ControlPanel\Keypad\MultiFunc, user will find all button keys and values. Sample is shown below.
User can change the value of each key from 0 to 17 as required.

