M3 ORANGE Key Customization
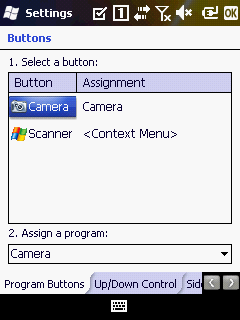
M3 ORANGE provides very flexible key customization. In Alpha-numeric version, all physical buttons except the power button are customizable subject to the registry change method is used.
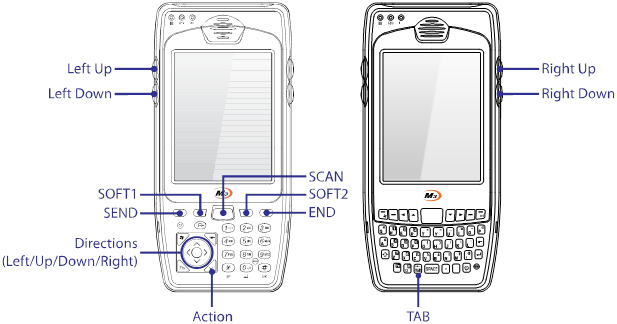
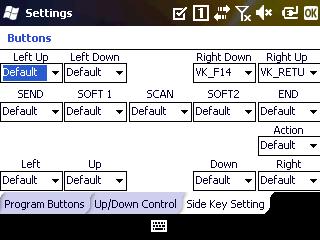
However, in general (GUI, M3.INI), only 14 buttons are customizable as shown below.
Customizable keys are: Left Up/Down, Right Up/Down, SEND/END, SOFT1/2, SCAN, Direction Keys, Action (Alpha-numeric only) and TAB (QWERTY only).
1. GUI Method
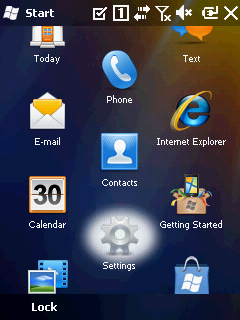
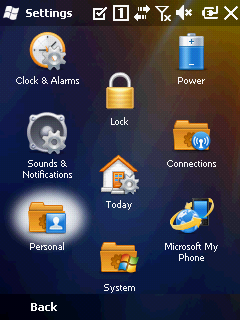
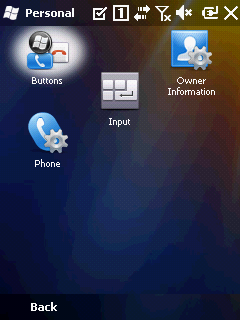
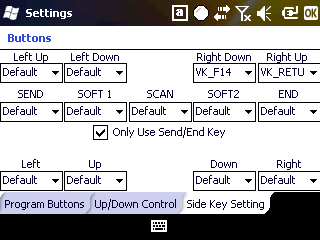
[Start] > [Settings] > [Personal] > [Buttons] > [Side Key Setting]
All keys shown above can be set to one of the following.
|
0
|
Default
|
Default value of the keys
|
|
1
|
VK_ESCAPE
|
Virtual key for escape
|
|
2
|
VK_F13
|
Virtual key for F13
|
|
3
|
VK_F14
|
Virtual key for F14
|
|
4
|
VK_F17
|
Virtual key for F17
|
|
5
|
VK_F18
|
Virtual key for F18
|
|
6
|
VK_SPACE
|
Virtual key for space
|
|
7
|
VK_RETURN
|
Virtual key for return
|
|
8
|
SIP ON/OFF
|
Toggles soft input panel
|
|
9
|
Application 1
|
User defined application1
|
|
10
|
Application 2
|
User defined application2
|
|
11
|
Windows
|
Windows key
|
|
12
|
Home
|
Home key
|
|
13
|
PgUp
|
Page Up key
|
|
14
|
End
|
End key
|
|
15
|
PgDn
|
Page Down key
|
|
16
|
Disable
|
Disable the button
|
|
17
|
VK_ACTION
|
Virtual key for Action
|
|
18
|
. (PERIOD)
|
Dot or full stop
|
|
19
|
, (COMMA)
|
Comma
|
When ‘Only Use Send/End Key’ option is checked in QWERTY device, it will not function as window or OK on ORANGE layer input mode. In other words,

+ (

or

) do not act as

or

.
User can customize the keys as required follow by OK button at the top right corner.
2. M3.INI Method
By editing M3.INI file, you can customize the keys as well. M3.INI is located in the StartUp folder in the Flash Disk of the Device. To edit the file, you may require copying the file to your PC.
If you open M3.INI file, you will find the following section:
M3Orange
Function : 0=Default 1=VK_ESCAPE 2=VK_F13 3=VK_F14 4=VK_F17 5=VK_F18 6=VK_SPACE 7=VK_RETURN 8=SIP ON/OFF 9=excute application1 10=excute application2 11=Winodws Key 12=Home 13=PgUp 14=End 15=PgDn 16=None 17=.(PERIOD) 18=,(COMMA)
|
[M3ORANGE_SIDE_KEY]
Install=0
LEFTUP=0
LEFTDOWN=0
RIGHTDOWN=0
RIGHTUP =0
SEND=0
SOFT1=0
SCAN=0
SOFT2=0
END=0
ACTION=0
LEFT=0
UP=0
DOWN=0
RIGHT=0
|
[M3ORANGE_SIDE_KEY_QWERTY]
Install=0
LEFTUP=0
LEFTDOWN=0
RIGHTDOWN=0
RIGHTUP=0
SEND=0
SOFT1=0
SCAN=0
SOFT2=0
END=0
LEFT=0
UP=0
DOWN=0
RIGHT=0
TAB=0
Only_SendEnd=0
|
From the file, change the value of Install to 1 and assign a value according to the function to each button as you like. Then, copy the modified M3.INI back to the StartUp folder. Customization will be applied after soft reset of the device.
3. VisualINI Method
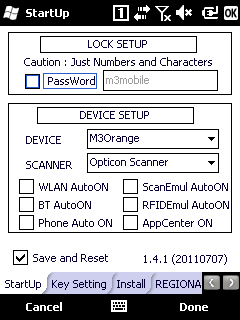
To use VisualINI, first you need to install it. To install manually, you can click VisualINI.CAB in Driver folder of Flash Disk or to install automatically after reset, set install value of [VISUALINI_INSTALL] to 1 in m3.ini file.
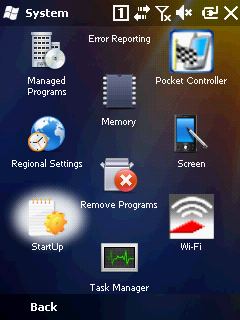
If VisualINI is installed, you can find StartUp icon at [Start] > [Settings] > [Systems] > [StartUp]
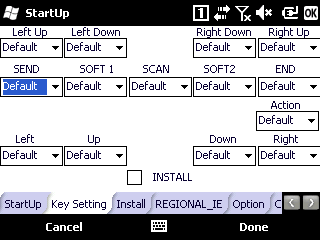
VisualINI provides the same function as the M3.INI file but with GUI. Hence, user can utilize VisualINI where directly editing M3.INI is not possible.
Make sure INSTALL checkbox is checked to make the modification affected.
4. Registry Change
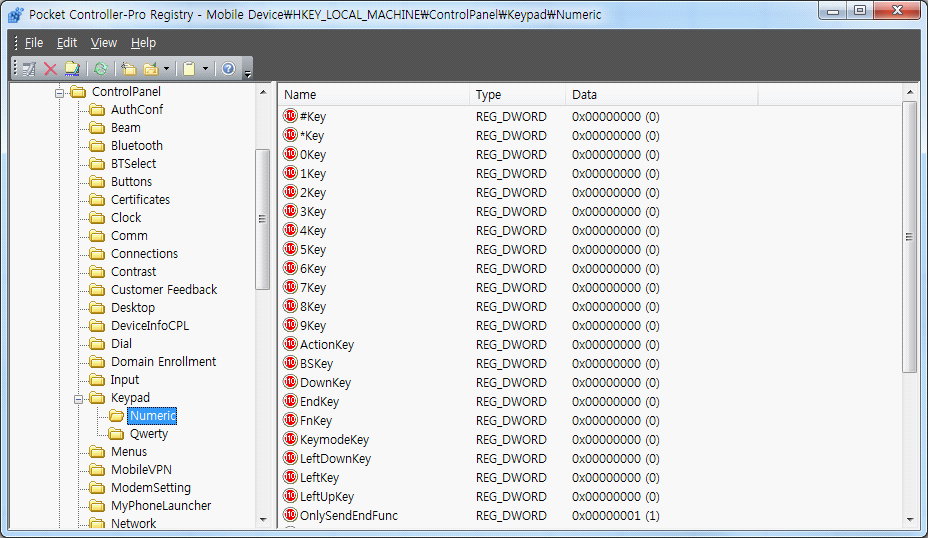
Under registry path: HKEY_LOCAL_MACHINE\ControlPanel\Keypad\Numeric or QWERTY, user will find all button keys and values. Sample is shown below.
User can change the value of each key from 0 to 18 as required.
How to figure out the each Virtual Key value in Window Mobile?
Please download
KeyMonitor program and place into the device.
When any key pressed, each key value will be shown up as up/down for each purpose.
With this key value you need to develop the wedge program(key value transformed) for your goal.

