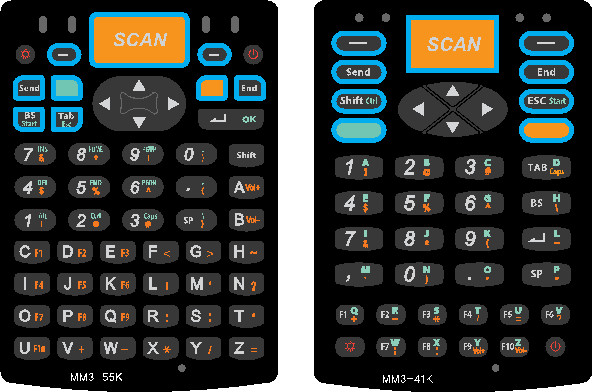
Both 55-key version (Left) and 41-key version (Right) of MM3 has 9 customizable keys as shown in the figure below.
There are 3 ways to customize the keys:
1. Using Windows Mobile GUI
2. Using VisualINI
3. Editing M3.INI
1. Using Windows Mobile GUI
Those keys can be customized as the following (screenshots are taken using 55-key version):
|
|
|
|
|
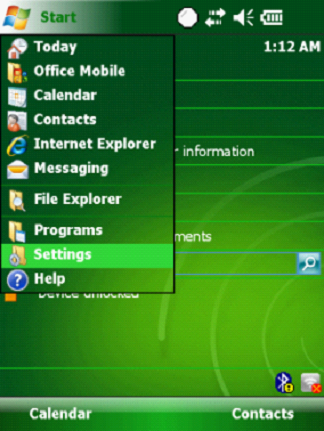
1. Gently tap the Start button and from the drop-down menu, select Settings.
|
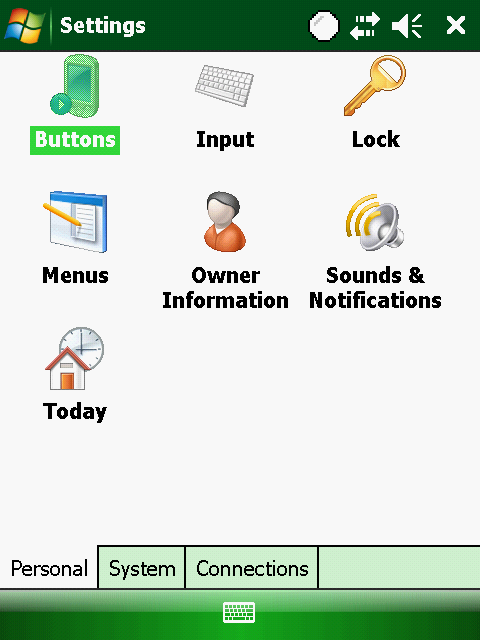
2. In the Settings select [Buttons]
|
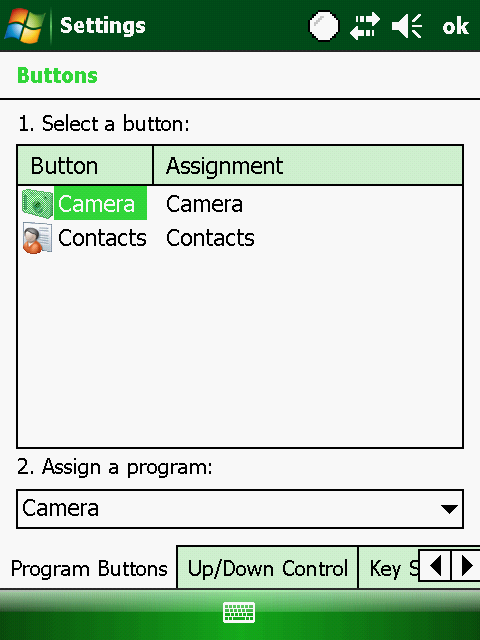
3. Select Side Key Setting
|
|
|
|
|
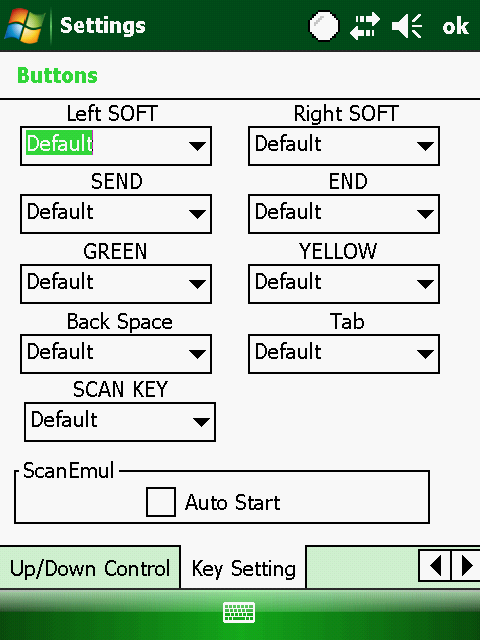
4. From the Key Setting Window, those 9 keys can be customized.
|
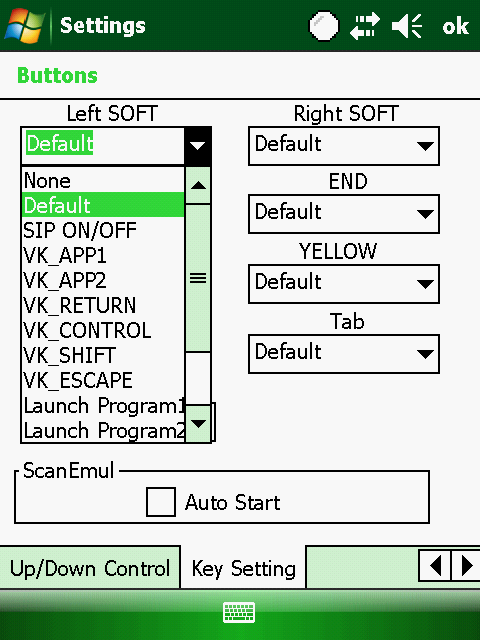
You can assign the following functions to the keys. All 9 keys have the same customization options.
|
None
|
Disable the button
|
|
Default
|
Default value of the key.
|
|
SIP ON/OFF
|
Toggles Soft Input Panel.
|
|
VK_APP1
|
Virtual key to start application 1.
|
|
VK_APP2
|
Virtual key to start application 2.
|
|
VK_RETURN
|
Virtual key for Return.
|
|
VK_CONTROL
|
Virtual key for Control.
|
|
VK_SHIFT
|
Virtual key for Shift.
|
|
VK_ESCAPE
|
Virtual key for Escape.
|
|
Launch Program 1
|
Launches a program assigned to Program 1.
|
|
Launch Program 2
|
Launches a program assigned to Program 2.
|
|
Launch Program 3
|
Launches a program assigned to Program 3.
|
|
Launch Program 4
|
Launches a program assigned to Program 4.
|
|
VK_M3SCAN
|
Scan key for Telnet Program. Key Value: 0x9C
|
|
VK_ACTION
|
Virtual key for Action.
|
2. Using VisualINI
To use VisualINI, first you need to install it. To install manually, you can click VisualINI.CAB in Driver folder of Flash Disk or to install automatically after reset, set install value of [VISUALINI_INSTALL] to 1 in m3.ini file.
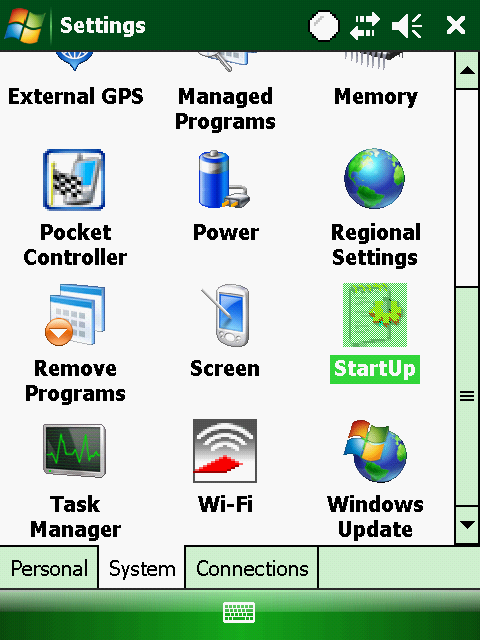
If VisualINI is installed, you can find StartUp icon at [Start] -> [Settings] -> [Systems] as shown in figure 2.1.
|
|
|
|
|
Figure 2.1 VisualINI
|
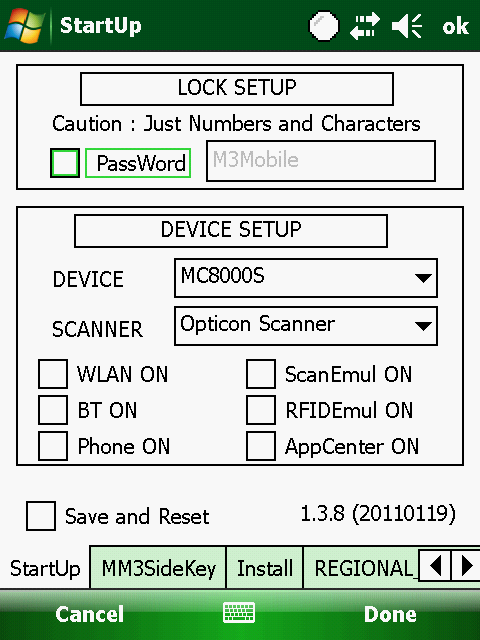
Figure 2.2 Device setup
|
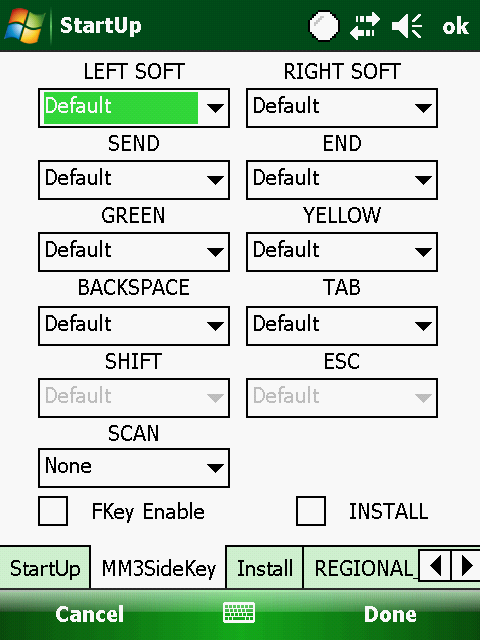
Figure 2.3 Side key setting
|
In the StartUp window, user must set the correct device model then, click ‘OK’ button to confirm it. Before going to the next step, the device must go through soft reset. Then, launch StartUp again to customize the keys.
From figure 2.2, go to MM3SideKey window for key customization. MM3 SideKey customization window is shown in figure 2.3. Check 'INSTALL' if you want to keep the settings even after hard reset.
Note that from figure 2.3, SHIFT and ESC drop down menus are disabled because the screen shot is taken using MM3 with 55-key keypad. If 41-key version is used, BACKSPACE and TAB will be disabled and SHIFT and ESC fields are activated.
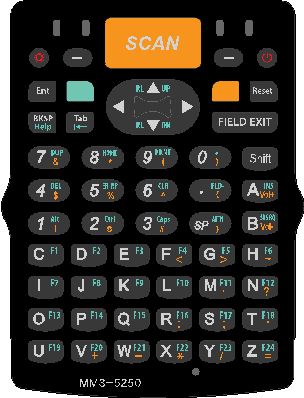
FKey Enable is available in B1ST(O/H)V645EN or later version. FKey Enable option is put in to the OS to make MM3 useful with Telnet programs such as IBM 5250/ IBM 3270 which uses F1 to F24.
This is why VK_M3SCAN is introduced. The default value of SCAN button is F14 which cannot be used in IBM 5250/ IBM 3270. When SCAN KEY is set to M3SCAN, the scanner will not work with M3 ScanEmul or ScanTest application.
If FKey is enabled, user can use F1 to F24 on green layer. Please refer to below MM3-5250 keypad.
|
|
Note that it has F1 to F24 on green layer on ‘C’ to ‘Z’.
|
3. Editing M3.ini
By editing M3.INI file, you can customize the keys as well. M3.INI is located in the StartUp folder in the Flash Disk of the Device. To edit the file, you may require copying the file to your PC.
If you open M3.INI file, you will find the following section:
////////////////////////////////////////////////////////////////////////////////////////
// MM3 SideKeys
// Function : 0:None 1:Default 2:SIP ON/OFF 3:VK_APP1 4:VK_APP2 5:VK_RETURN 6:VK_CONTROL
// 7:VK_SHIFT 8:VK_ESCAPE 9:Launch Program1 10:Launch Program2 11:Launch Program3
//
////////////////////////////////////////////////////////////////////////////////////////
[MM3_SIDE_KEY]
Install=0
LEFTSOFT=1
RIGHTSOFT=1
SEND=1
END =1
GREEN=1
YELLOW=1
BACKSPACE=1
TAB=1
ESC=1
SHIFT=1
SCAN=0
EnableFKey=0
From the file, change the value of Install to 1 and assign a value according to the function to each button as you like. Then, copy the modified M3.INI back to the StartUp folder. Customization will be applied after soft reset of the device.

